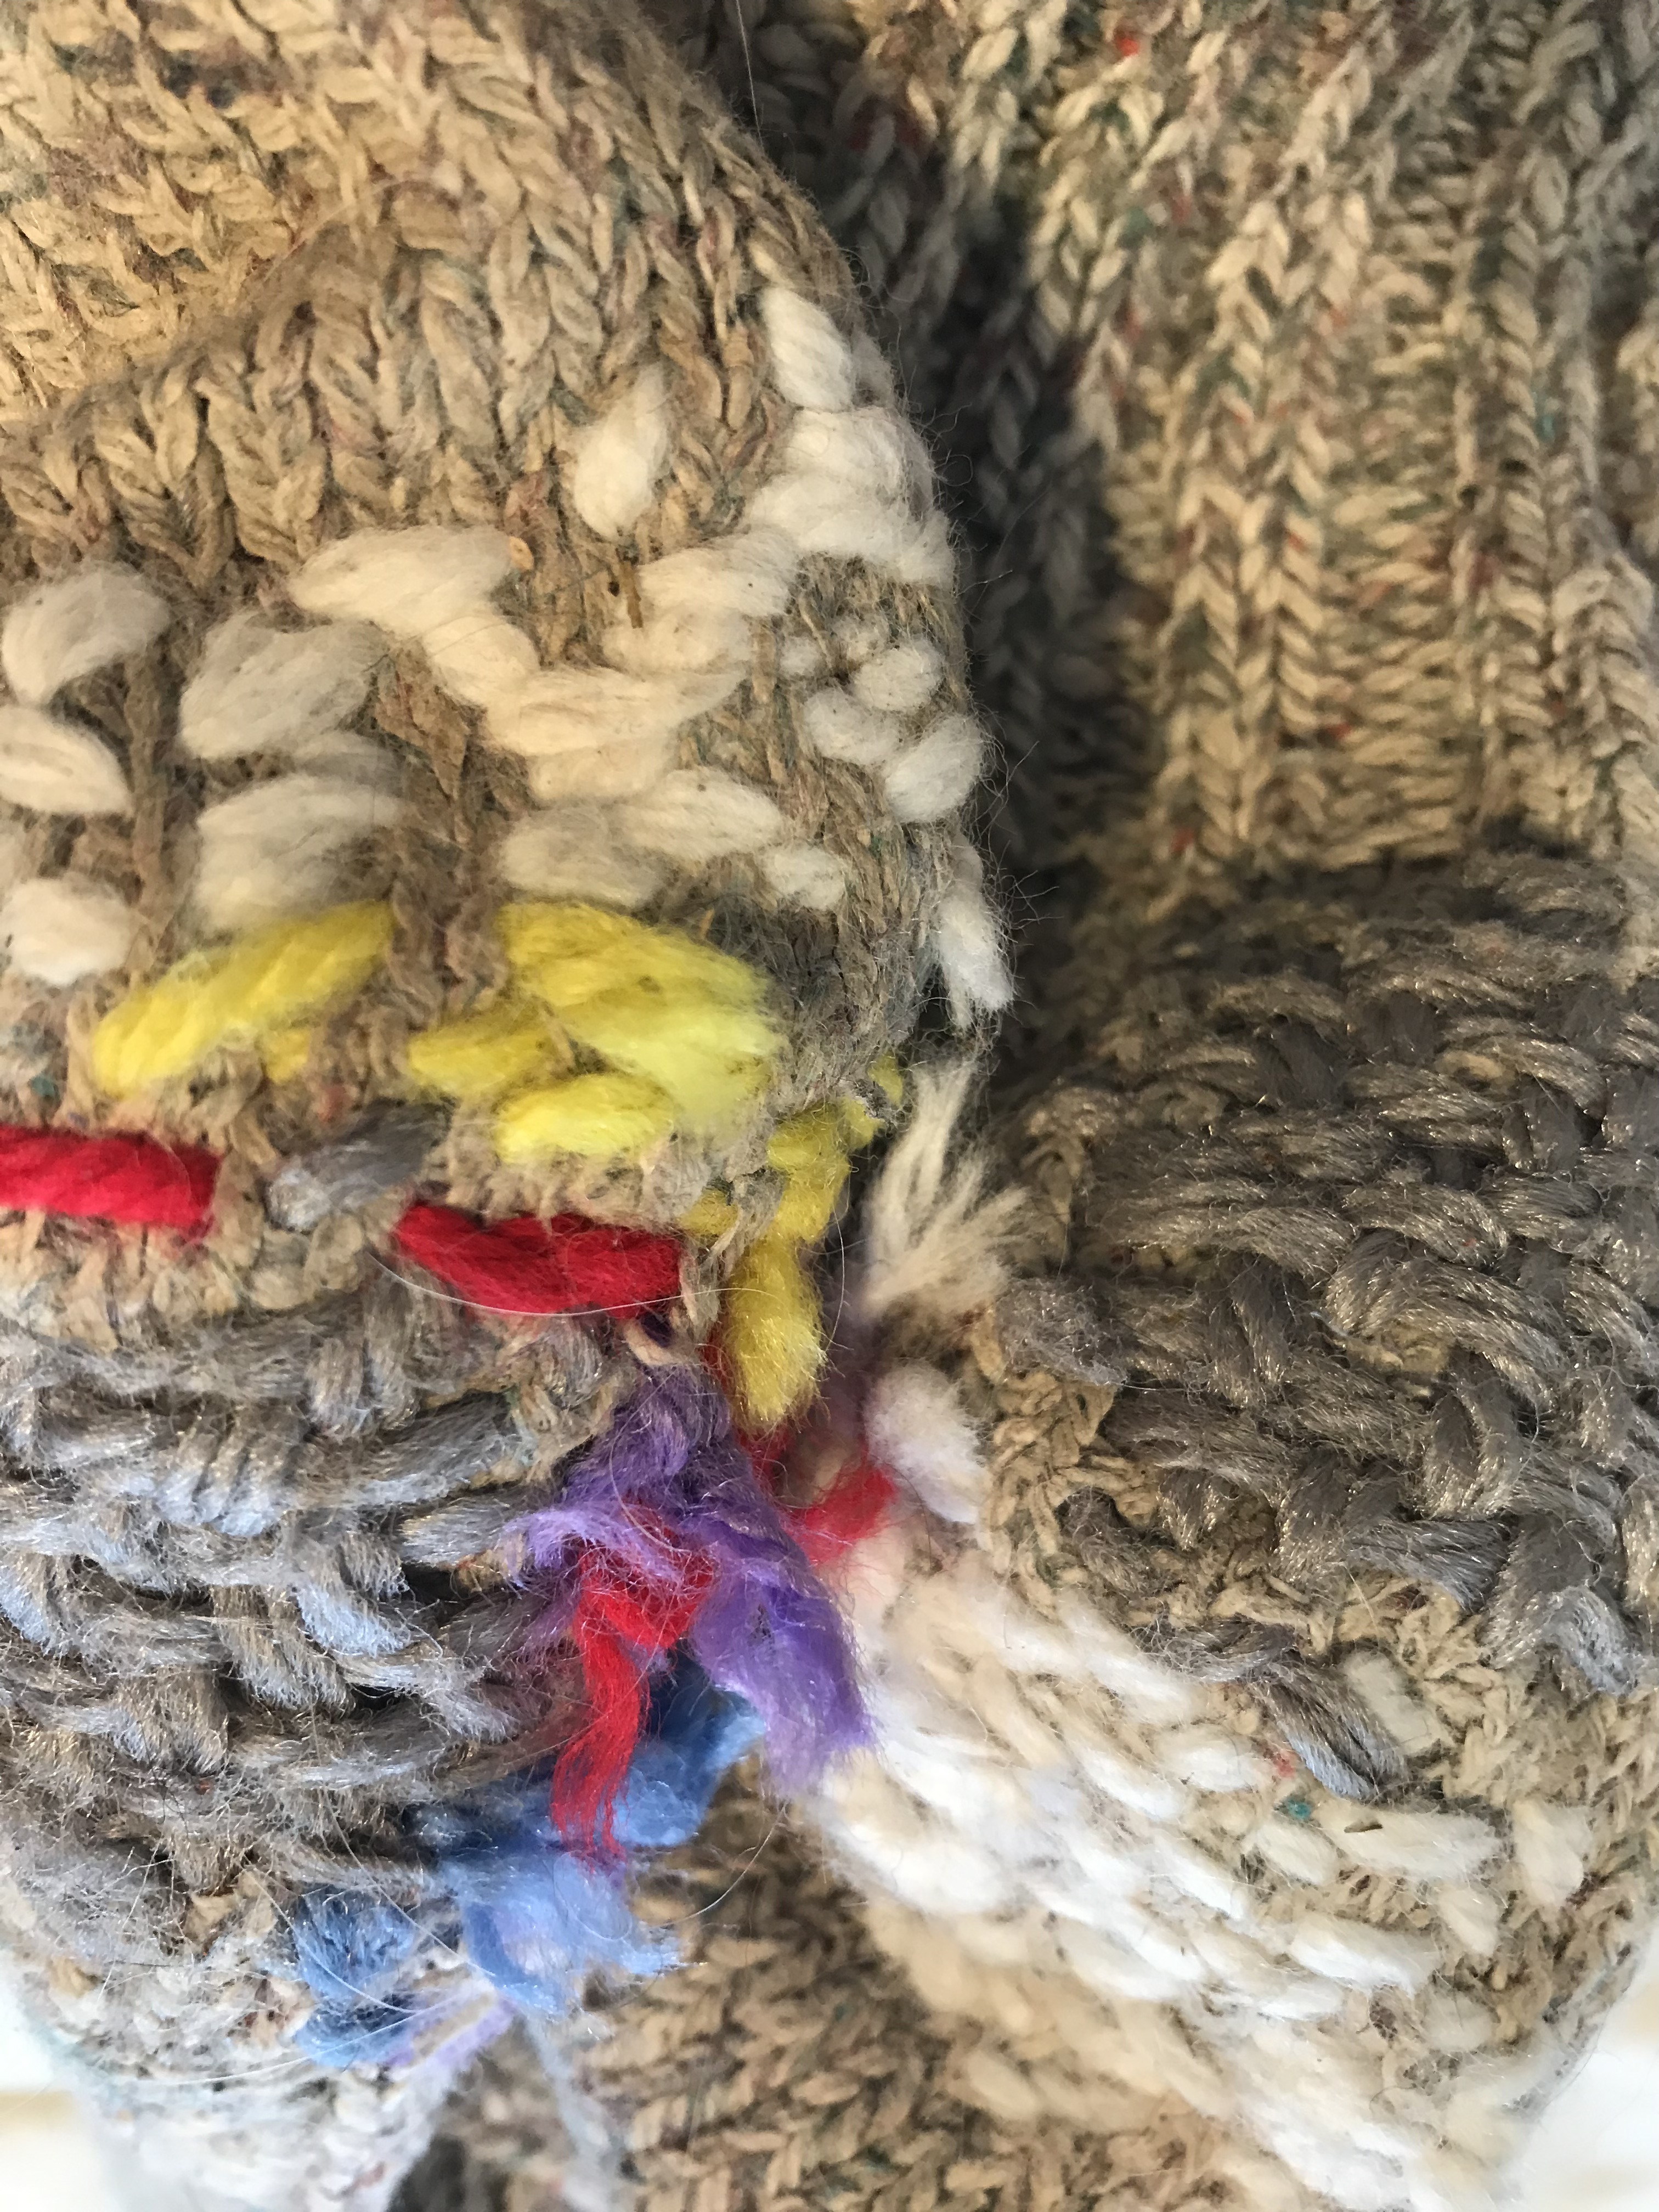
I’m gonna fray. (Original darning is in gray.)
I’m gonna fray. (Original darning is in gray.)

Today is a great day for sewing.
I’m so busy that I barely have time to read a blog from another busy person.
Using three sewing machines at once is keeping me very busy.
That’s right folks; edging, strait stitching, and buttonholes all at the same time. It would be really efficient if I didn’t almost cut the project in half with the serger.
Much too busy to vacuum the floor or clean-up projects around the sewing machine. So busy.
In the words of a wise woman “Moral of the story. We are all “busy” in our own way. #dontjudge #priorities“
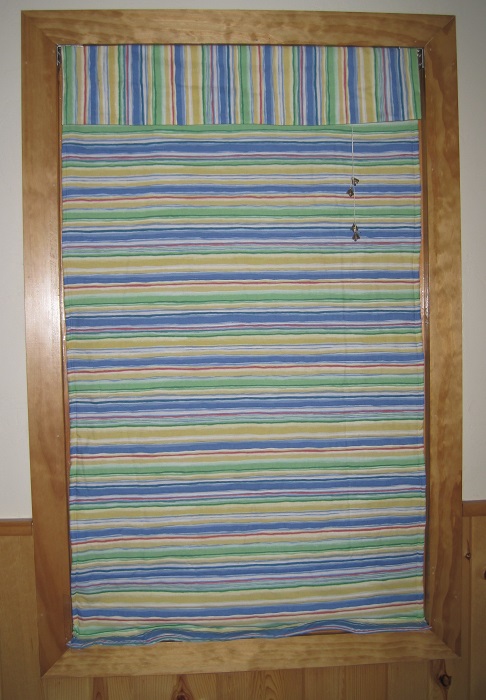
My first window quilt is complete, after sitting in various stages of progress for literally years!
Completed window quilt
The window-facing side is made from a patch work of old jeans, inspired by the Quilts of Gee’s Bend. The jeans were hard to work with because I didn’t use the most stained regions (this means lots of old jeans) and the denim had lots of variability due to the variety of original weave, amount of wear, and that I didn’t align the grain. The conglomeration wanted to stretch in unpredictable ways.

Old jeans and bras
The batting is fleece from a neighbor’s stash. It was bought for a project and never used.
The room facing fabric is from the thrift store. It was just big enough for this one window.

The new quilt can be opened!
The hardware was from the Roman shade that was in the window when we bought the house. The pull had come apart some time ago and the shade was permanently in the closed position.

The replaced shade
Fabulously, I was able to use hardware that I saved from old bras to route the pull cord. Before you start thinking that I lead a depraved life to gain such satisfaction from reusing bits of old underwear, note that the rings don’t quite match. That’s because I’ve enjoyed a variety of colored underwear: white, pink, tan. Also, each set of hardware represents new underwear. New underwear provides a joy akin to that of new shoes. If you haven’t experienced this, perhaps you have too many clothes. Or perhaps you are more spiritually advanced than I. To dispel you the notion that I have an unhealthy fascination with underwear, I also collect hardware from bib overalls. Still not convinced? Oh well. Artists are rarely appreciated in their own time.

Hardware for future projects
What will I do differently next time? First of all, I will use whole cloth or match the grain on the window side of the quilt, mostly to expedite the process. Secondly, I will use a double-fold binding instead of self-binding the edges. This should give the quilt a tidier look. I like the haphazard look of the jeans-side, but the not-quite-even edge on the striped side isn’t as pleasing to me. Third, I would sew the bra hardware on by machine, so that the stitching holds all of the layers together. I sewed this one by hand, only through the denim.
I would use fleece again for a batting. It is light weight, insulating, and easy to sew through. Used blankets should be a good source of fleece. Did I mention this is my first machine quilting project of any size? It is.
Now what to do with the old shade? Do you need a short chicken fence? That will have to wait until next spring. Until then, enjoy the warmth of winter by bundling up!
Mom taught me how to sew without a map. No pattern, no pins unless essential, inexpensive materials, with measurements and math on the fly are par for the course. This can lead to unexpected results, such as the time that I sewed through my thumb with the machine when I was a teen.
This pillow project was simple and successful. Here’s the pillow in a flannel case sewn from an upcycled flannel sheet. The plants behind it are purple loosestrife, being raised to propagate bio-control beetles.

Zippered pillow case
The outer case was made from a fabric scrap purchased at the thrift store. Due to the shape of the scrap, three pieces were sewn together to make the case.

Frog pillow case
Because I’m a geek, I love that almost all of the fabric was used. (Didn’t Jack make a nice butterfly to repair the seat of my chair?)

Scraps
The total cost for a fully covered pillow plus all of the other scraps that are yet to be used: $6.50.
New pillow form; rummage sale; $0.50
Flannel; Mom; upcycled from sheet
Zipper; Mom or thrift store; $1.00
Frog fabric from bag of scraps; thrift store; $4.99
It is almost midsummer. Happy Summer Solstice!

Birch leaves in the late day sun
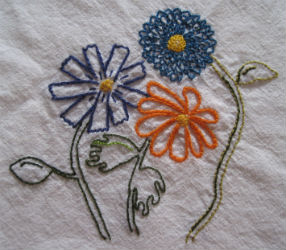
I’ve been working on embroidery for at least a year. Here are some of my recent projects. These flowers are adapted from a design by Clare Youngs in the book Scandinavian Needlecraft. It was noted how similar this design is to some Ojibwa designs.

This Día de los Muertos (or Day of the Dead) inspired design is my own. The design was sketched during a Wisconsin Library Association conference. (I contend that I can listen better when my hands are busy with a repetitive task.)

I was pleased with the results. The first attempt was freehand on the towel, which didn’t please me very much. Part of the problem was that the hoop was quite a bit smaller than the design, so I couldn’t see it all at once while I was working on it. Perhaps I will “fix” it someday by adding some pretty brains, but now I am interested in other projects.

Here’s another freehand, doodle design. I would like it better if the flowers had been based on actual plants.
The tree design was adapted from one by Aimée Ray in Doodle Stitching: The Motif Collection. There is a design to inspire almost anyone in this fun book.

An upcycling project that I had been considering was to make a rug from old t-shirts. The process of cutting the strips held me back, even though I use a rotary cutter. Enter one of my favorite thrift stores, The Clothes Closet of Hettinger, North Dakota. I purchased two latch hook rug canvases, fabric strips, and a latch hook tool for one dollar! One rug was started, with a fabric strip for each “hole” in the canvas. It was bunched-up, but I thought that might be due the small size of the started rug. I added more strips. It didn’t get better. I took apart the rug and washed the fabric strips in a lingerie bag. The washing made the fabric curl up and easier to latch to the canvas. The Crafty Woman blog has detailed instructions on how to make a jersey rug and spacing the strips made the rug much easier to hook and it laid flat right away. The fabric strips that I used are 3/4″ wide by 6″ long.

A project that I want to start is re-covering the cracked vinyl covers on four kitchen chair seats. Jenny suggested that I should cover the fabric with a clear vinyl so that they are easy to clean. What a great idea! If you have any suggestions before I start, please let me know. Here’s the fabric that I picked up for the chairs at another favorite thrift store, Waupaca Thrift Store.

While I was writing this post, I was listening to an audiobook until it got too difficult to write and focus on the story. Turns out that I can fold the laundry, but not compose, while listening. The book is The Case of the Deadly Butter Chicken by Tarquin Hall, featuring the fictional private investegator Vish Puri. Besides the great title, the book provides a great description of contemporary India, detailed characters, and a good mystery without being too cozy or too violent. I highly recommend it to mystery readers. If you are a Wisconsin resident with a library card in good standing, you may download the audiobook through Wisconsin’s Digital Library. There is no additional cost for Wisconsin residents to check out this book, since it has already been paid for through taxes.
Since it is Halloween…it’s time for Frankenpants! George tears and wears his pants out at a frightening rate. I get snagged on the barbwire fence and slow down and try to unsnag. George just pulls hard enough to get away. Almost all of our jeans come from thrift store. It just isn’t worth the extra money to buy them new off the lot. I also mend our farm pants. Style isn’t a big part of our farm life. Therefore…Frankenpants!

Frankenpants…Lee top and Wrangler bottoms
The crotch was torn (speed trip through the barbwire?) and the knees were worn out in the bibs. Also George didn’t like the button fly. He mumbled something about them being too breezy. What to do? Sew the good parts off a pair of worn jeans onto the bib tops and ta-da: Frankenpants!

The rear view
To be honest, it would have been more efficient to go and buy another pair of thrift store bibs, however I took it on as an artistic challenge. And it is quite possible that my “free-time” is free and doesn’t have any value. (I don’t want to explore that idea too much.) George has tried on the Frankenpants and declared them a success. Time will tell.
Anyone want me to alter their prom or wedding dress? Zig-zags and contrasting thread included!
More on speed over style. Love those little cake pops? Can’t imagine making cute spheres out of food? Don’t want to count how many you would eat? Make a chocolate cake and some yummy mocha frosting, dump together, close your eyes and enjoy!

Chocolate cake with mocha frosting
Happy Halloween everyone!
Mom taught me how to sew when I was in second grade. One of my first projects was a t-shirt. Another project was a big stuffed whale. Mom had to help me with the zipper…the mouth had zipper lips to open and close it. I was delighted when she made the mistake of sewing the zipper in backwards (the zipper pull was towards the inside of the mouth). My part of the sewing was perfect…the biggest error was Mom’s.
What Mom didn’t teach me was how to finish a project in a timely manner. She has very little interest in finishing one project before starting another. This has been very freeing to me. Perhaps a little too freeing. I have no idea how many started, but unfinished projects I even have.
In the fall of 2011, a book caught my eye. It is Scandinavian Needlecraft and includes great embroidery designs, mostly on wool. The book wasn’t in our library system at the time, so I tried Scandinavian Stitches instead. Author Kajsa Wikman has lots of great designs in it, including soft baskets and stuffed fabric birds. I loved one of the baby quilts in the book, but I wasn’t about to make a quilt just to hang on the wall. It occurred to me that Jessie was having a baby in December and the quilt has lots of blue in it (a color that she might not see enough of these days). A winter theme, lots of blue, and a December baby…a perfect combination.
I dug through my stash and found the perfect colors for the sky. I needed a little more variety and was happy to find a great match at the local thrift store. A couple of small pieces were added for variety and everything was ready to go. The cutting and sewing began at Mom’s house on Thanksgiving weekend. The top went together quite quickly.

Fox peeking out from the snow
The hand quilting took longer. It turned out to be the perfect project for me. I quilted at the hospital while Grandpa Neil was there. I quilted at Grandma Siggie’s while we spent time together. I quilted at the nursing home while Grandpa Neil was there. I quilted with friends while taking time for myself. Some of the stars are less than perfect. Some stars have more than five points. Maybe Ivy and Clara will look for them when they need a quiet project.

Stars in the sky
Since I’ve never finished a quilting project, this was my first attempt at cutting the binding on a bias. I thought about it for quite a while, folded the fabric, and cut. Was I ever surprised to find the zig-zag that it made. Hindsight was much clearer than foresight.

First try at binding
It was a happy day when I got the bias tape cut, ironed, and rolled. The binding finally was domesticated.

Spool of binding
It was time for the label. Jenny made one for the quilt, but it wasn’t quite what I had in mind. A friend told me about her label making process: spray adhesive on a sheet of printer paper; apply an oversize piece of fabric on it; cut the fabric to the size of the paper; feed the paper/fabric into the inkjet printer; print with the desired text; and set with a hot iron. Since I hope this quilt will withstand lots of washing, I decided to make the label more permanent by embroidering on top of the ink.

The fine print
It then seemed to take forever to finish the label and sew it onto the quilt. I had put off putting the binding on so that I could sew the label only on to the back of the quilt. I did everything just right for this process until the last moment, a moment of excitement, when I sewed the label through the entire thickness of the quilt. It was fortunate that the bobbin thread was white and nothing puckered in the process! I wasn’t about to tear it out at this point.

The completed quilt
The finished quilt was ready to give to Jane on March 24, when we celebrated Grandma Elma’s 93rd birthday. Jane and I met for the first time. It was a good day for many reasons, a small one was that this project was completed!
And now for something completely different…
George made a very good supper of squash and nettle lasagna tonight. That’s right…stinging nettles turned into a yummy supper.

Everything is good with lots of cheese
